The Admin console is only accessible to the Org Admin. If you are an Org Admin then you can access the Admin console by clicking the blue dot on the top right hand corner of your TolaData account and selecting the ‘Admin console’ tab.
What can you do in the Admin console
In the ‘Admin console’ there are options for settings, configurations and user management. There are five sections in the console – ‘Configuration’, ‘Users’, ‘Organisation details and exports’, ‘Custom styles‘, and ‘Change log settings‘.

How to manage users
Invite new users: The user accounts for your organisation are managed in the Admin console, which you find by clicking the blue circle icon at the top right of the screen, you will be brought to the ‘Users’ tab, where you can then click the green button ‘Invite user(s)’.
Enter their email address and click ‘Add’. The user will receive an email inviting them to set up their TolaData account.
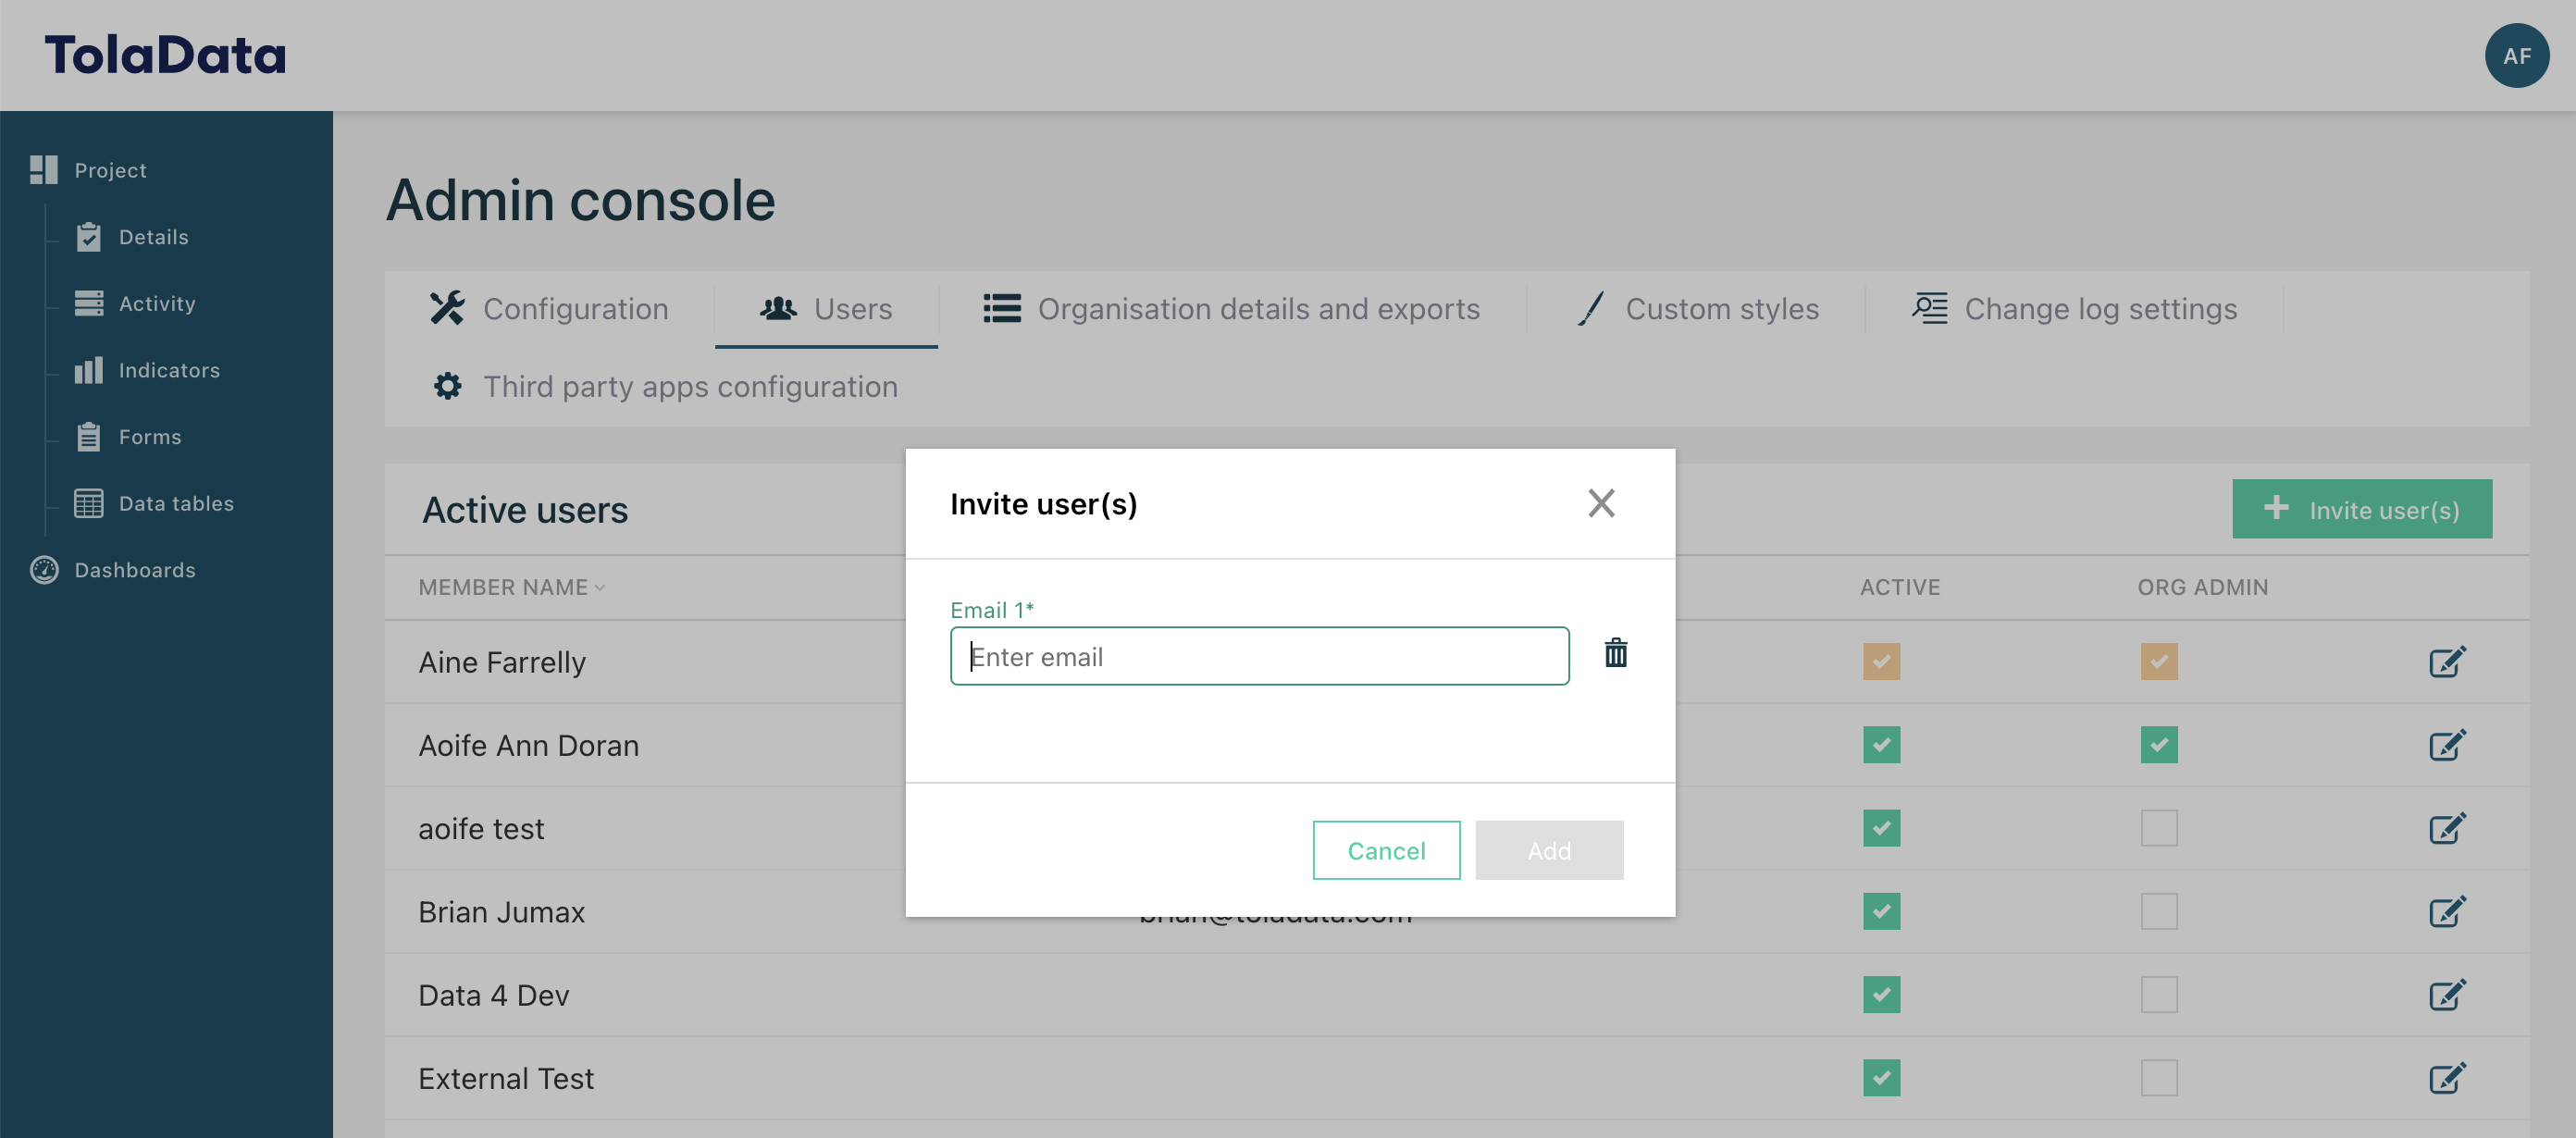
Org Admin: To assign a member of your organisation with Org Admin permissions, simply tick the column next to their name. Remember you can only access this console as an Org Admin. You can have multiple Org Admins to an organisation, the difference in an Org Admin and Org User is explained here.
Deactivate users: You can only deactivate users who have already been invited to your organisation unit, and have completed their account setup. Navigate to the Admin console as explained.
If the checkbox related to the user has an orange tick, then the user is active. Simply uncheck this box to deactivate the user. A warning message will appear to confirm the deactivation.
How to configure your organisation’s settings
Under the ‘Configuration’ tab, the Org Admin can format numbers for their organisation, customise the names of the workflow levels and define the values of certain drop-down menus.
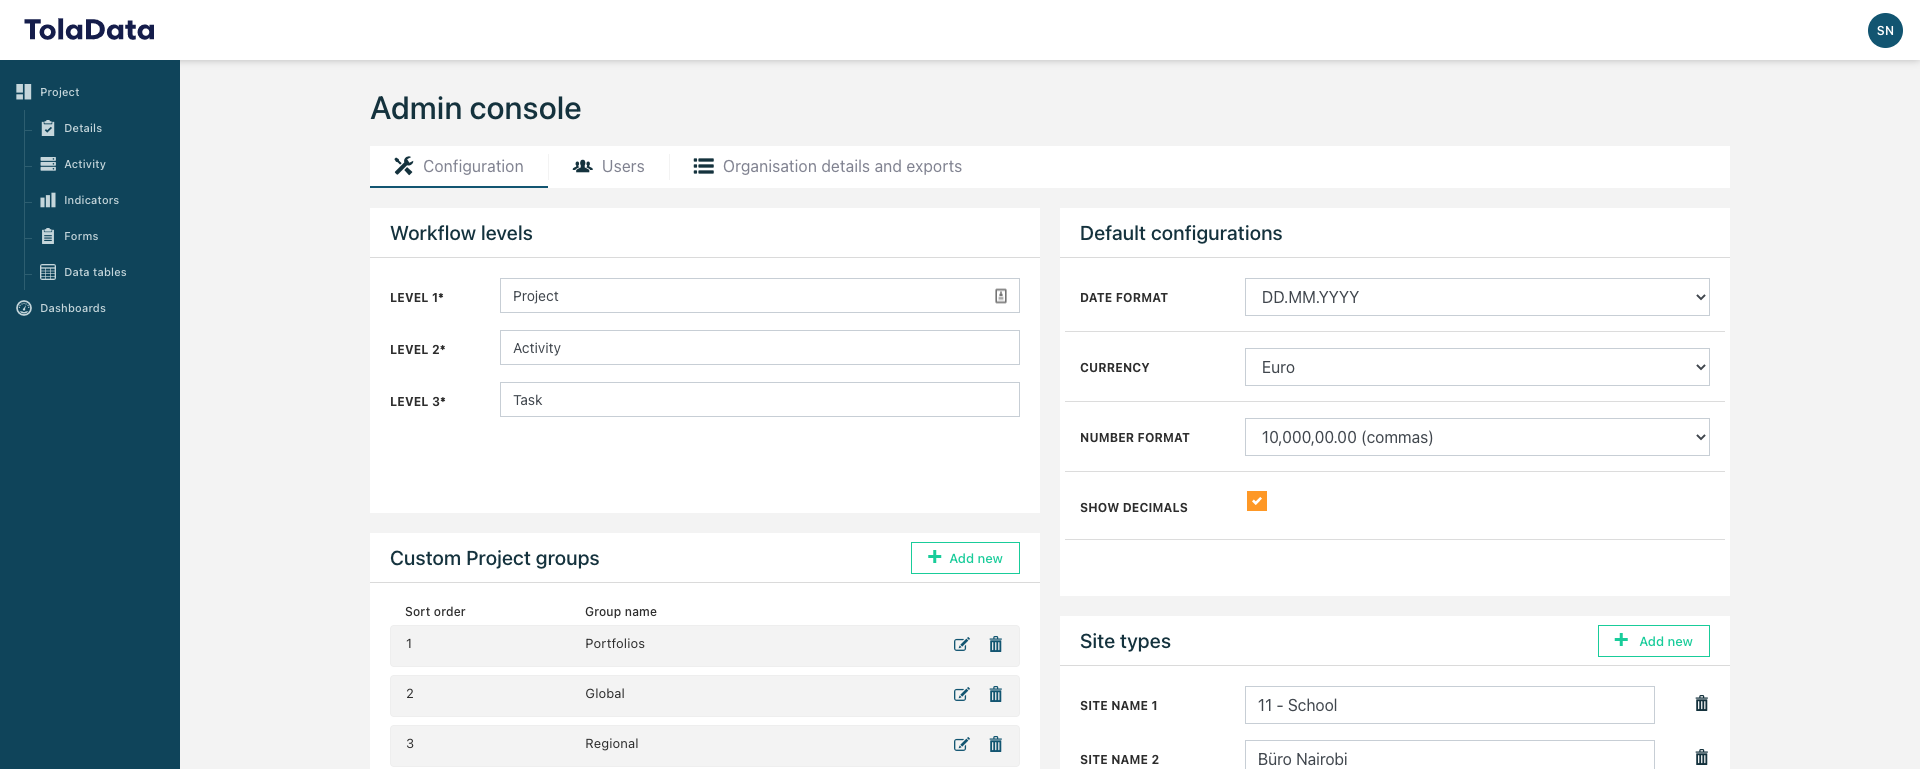
Workflow levels
The three workflow levels are by default named ‘Project’, ‘Activity’ and ‘Task’. Should you wish to change the terminology used in the system, you can edit the names and click the green ‘Save’ button.
- Workflow level 1 – Project
- Workflow level 2 – Activity
- Workflow level 3 – Task
You can change your workflow level names, for example, if your organisation refers to the first workflow as ‘Program’ rather than ‘Project’, you can change it here.
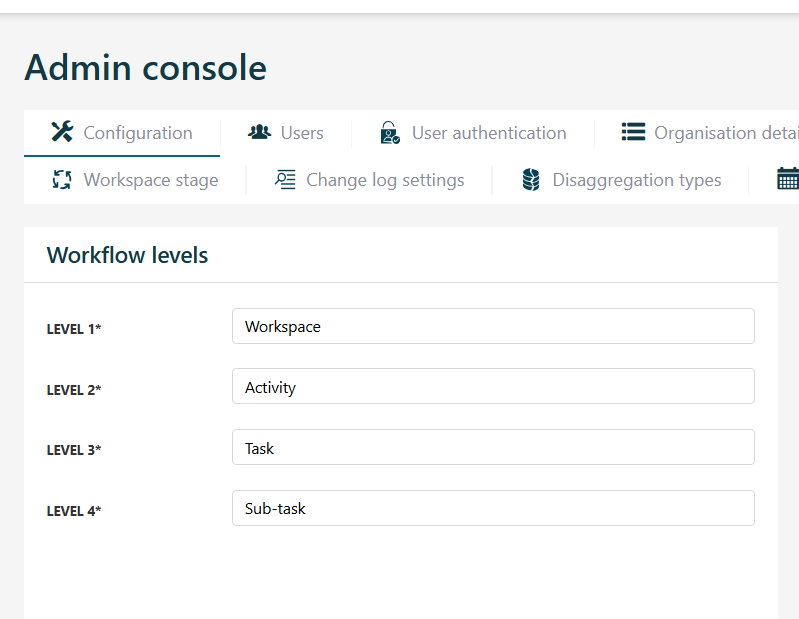
Please note that these names are not translated by the system when a user sets their profile to a different language.
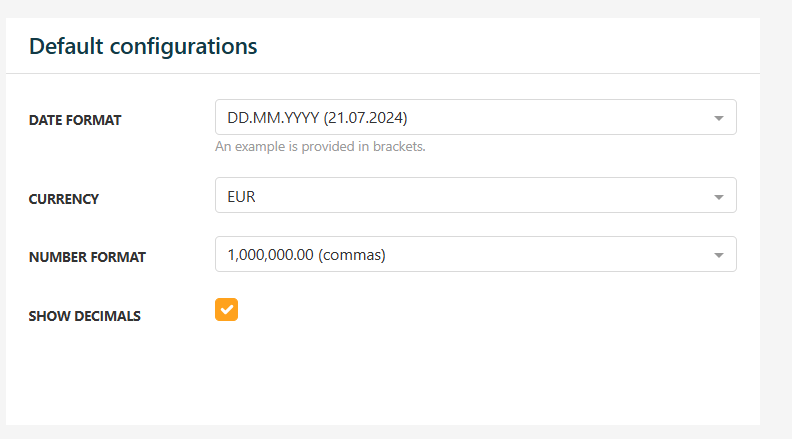
Default configurations
You can set the default date, number format, and currency configurations. Select from the options in the drop-down menus and then click ‘Save’. Your selections will apply for all users of your organisation.
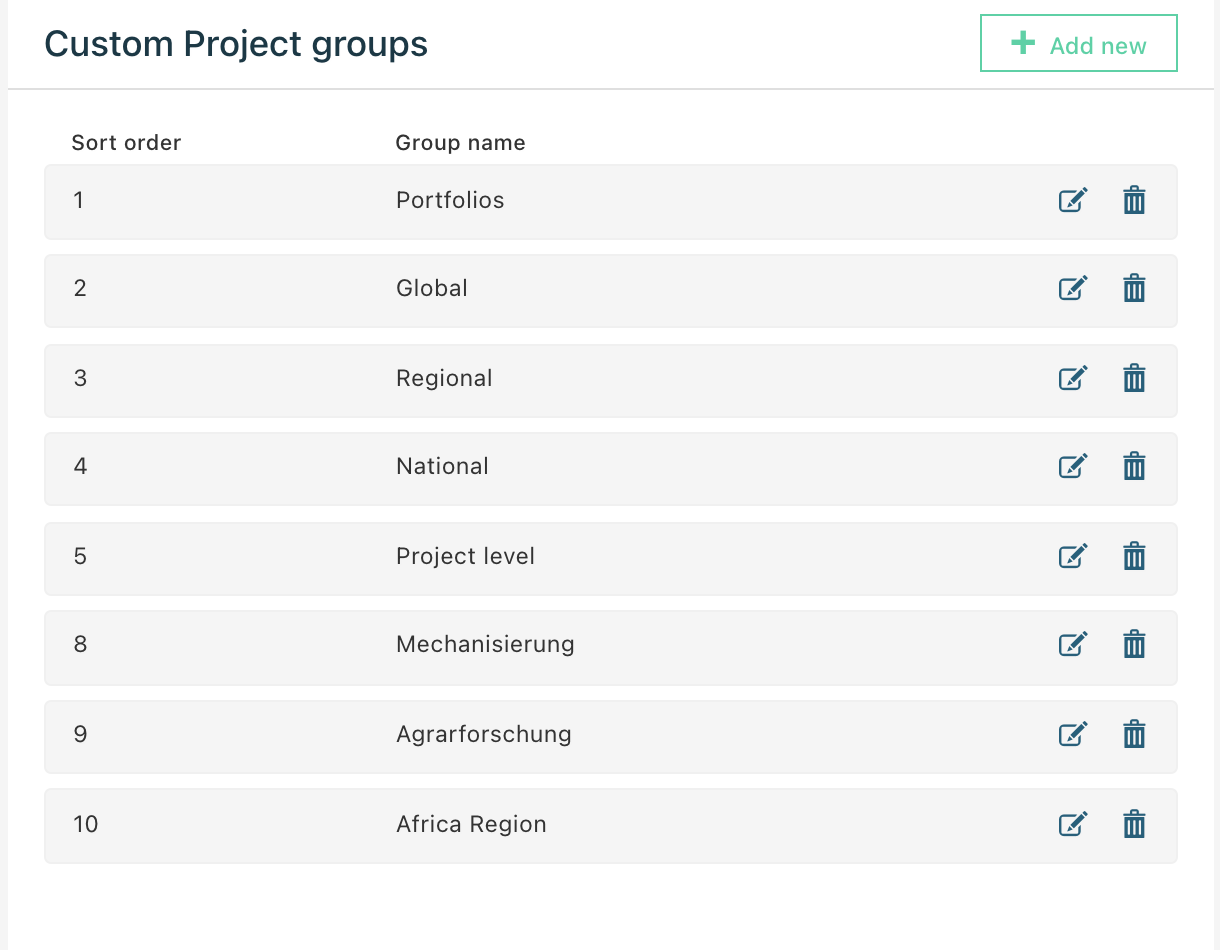
Custom Project groups
You can sort your groups into customized collections under the ‘Custom Project group’ section.
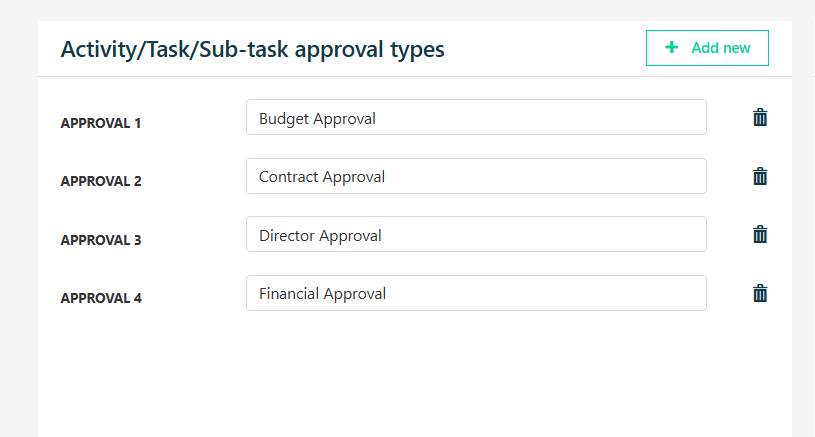
Approval type
You set the approval types that can be selected by users when they create a new approval in the wfl2 (activities) section.
Click ‘Add new’ and enter the name of the approval type you want to appear in the approval type drop down list and then click ‘Save.’
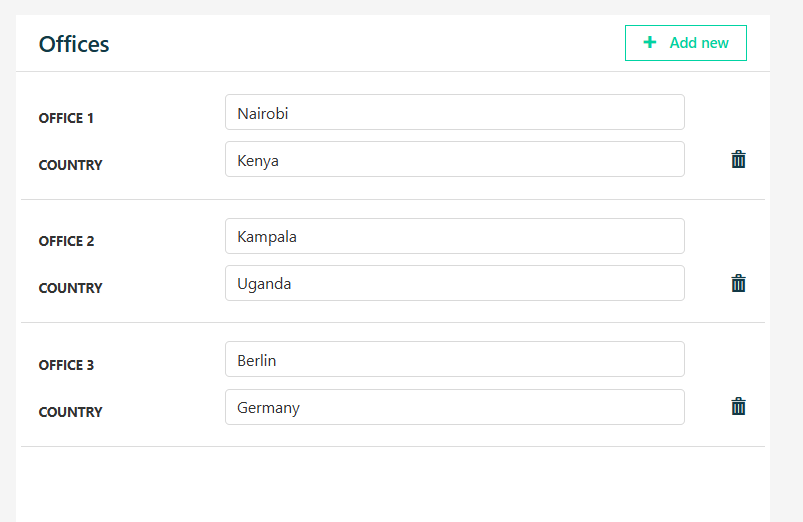
Offices
You set the offices that can be selected by users when they create a new site to show which office of your organisation the site is managed by. This functionality can be especially useful for large organisations, with many field offices responsible for implementing projects in numerous locations.
Click ‘Add new’ and enter the name of the office and its country location and then click ‘Save.’
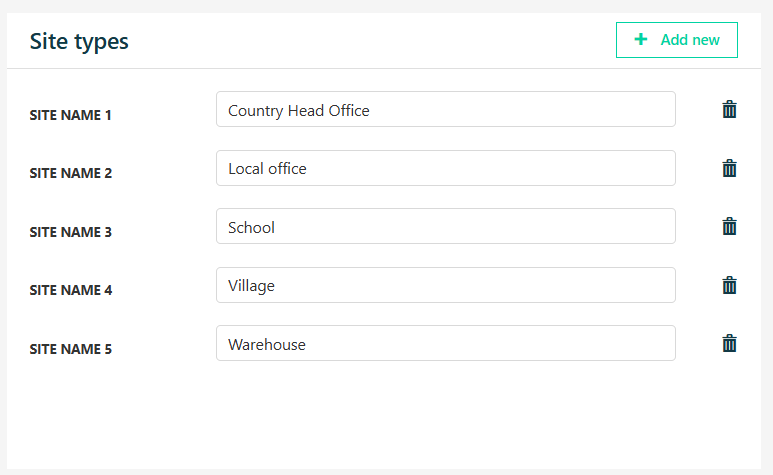
Site types
You set the site types that can be selected by users when they create a new site.
Click ‘Add new’ and enter the name of the site type you want to appear in the site type drop down list and then click ‘Save.’
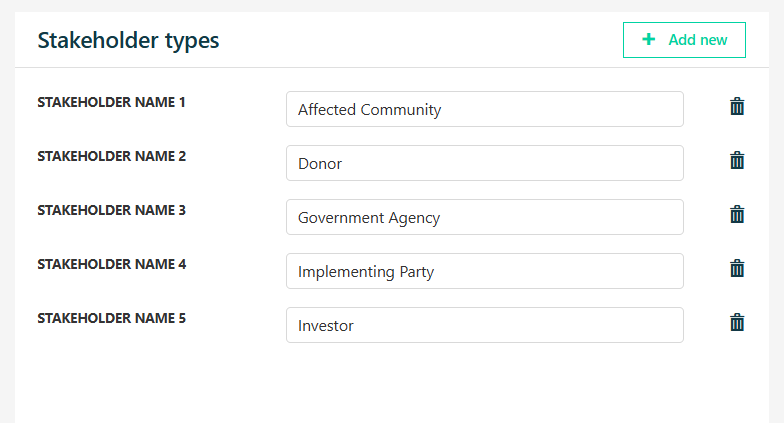
Stakeholder types
You set the stakeholder types that can be selected by users when they create a new stakeholder.
Click ‘Add new’ and enter the name of the stakeholder type you want to appear in the stakeholder type drop down list and then click ‘Save.’
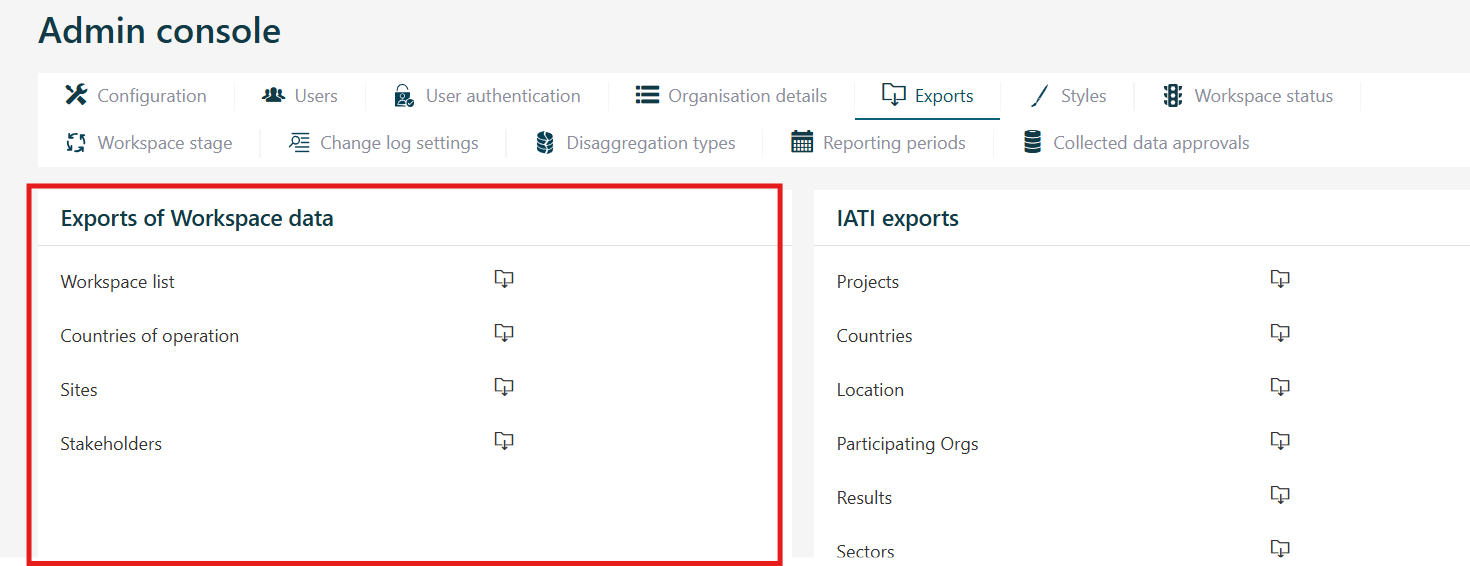
How to export your organisation’s data
In the ‘Organisational details and exports’ section you can export your entire project list, countries of operation, sites, stakeholders, indicator results and indicator results with periodic targets in CSV format.
Additional information on the formatting of exported data sets can be found in the ‘formatting exported data’ guide.