With the bulk import feature, users have the ability to import multiple indicators in the Global Indicator library at once.
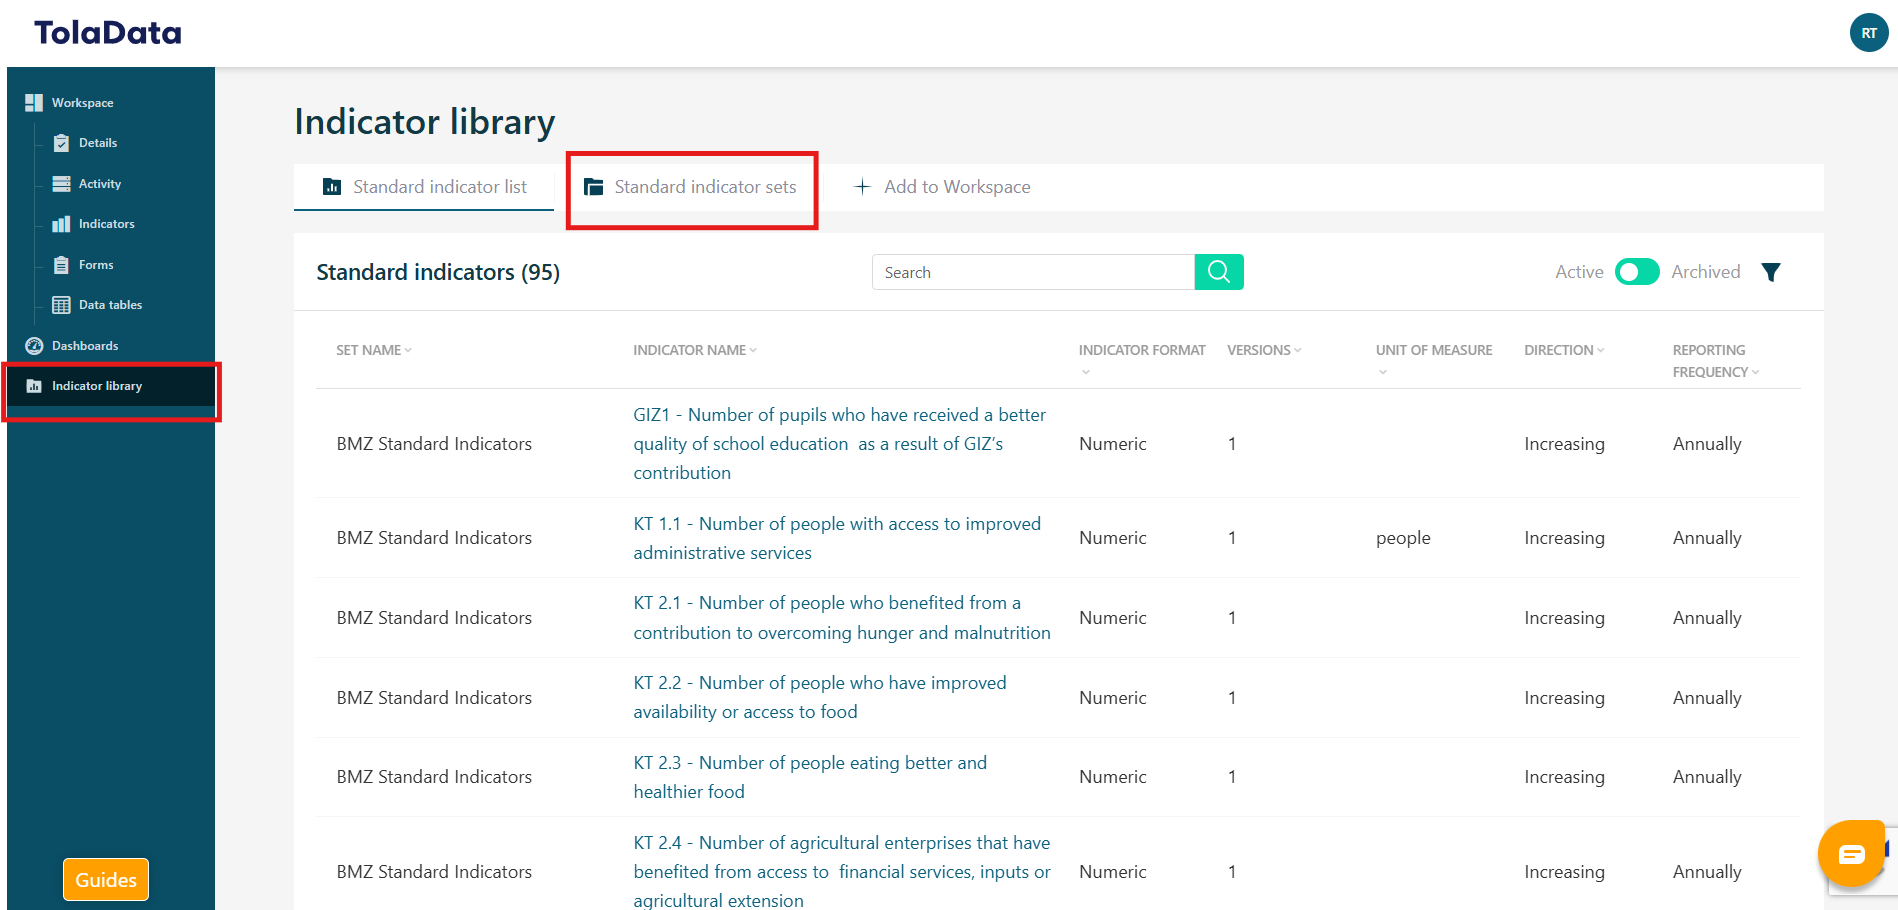
Navigate to the ‘Indicator Library’ tab of your workspace/ project.

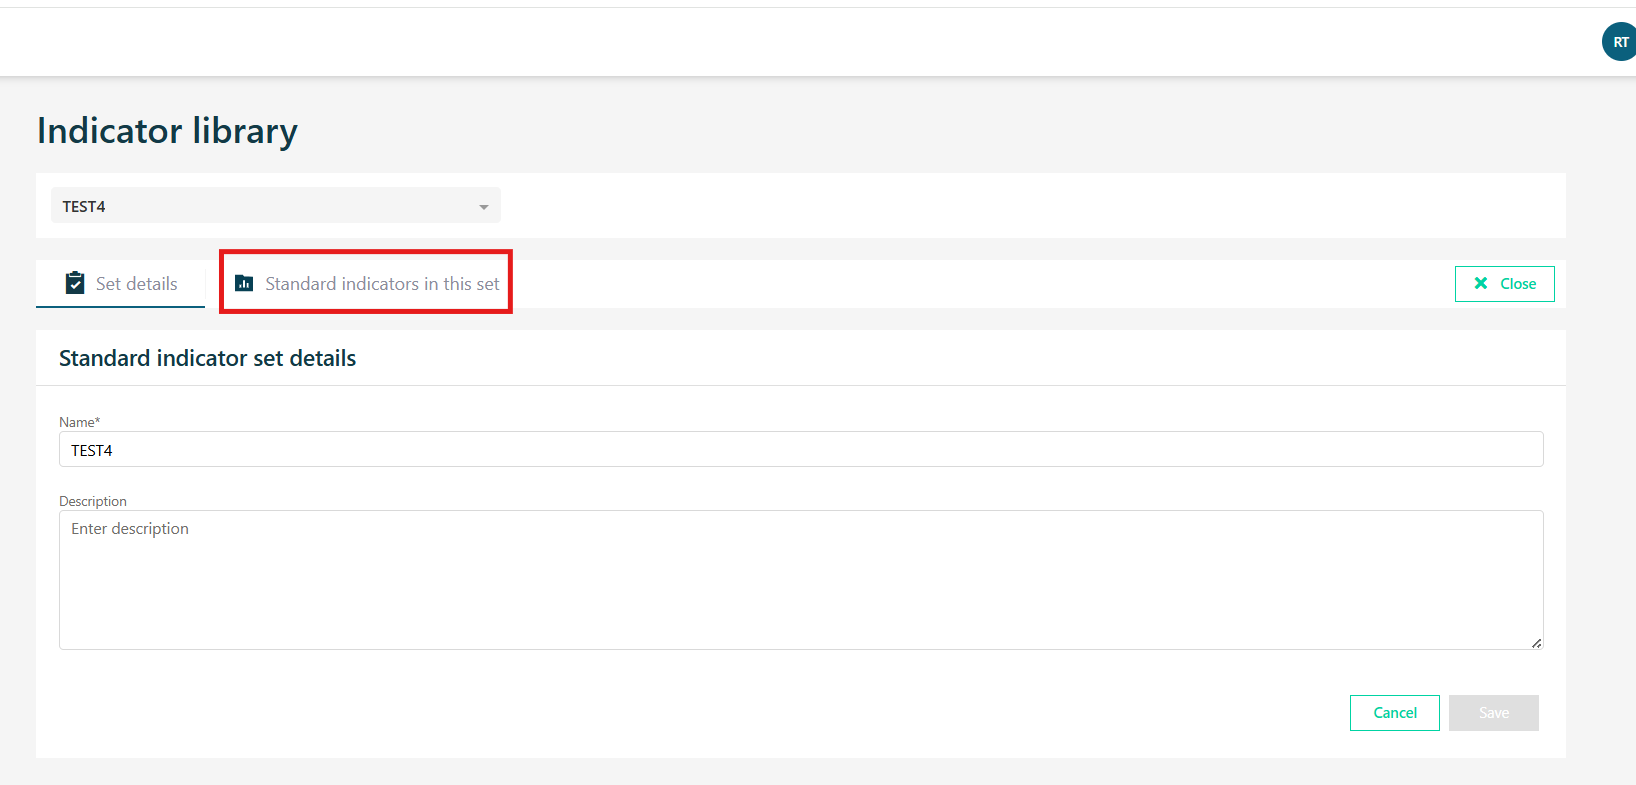
To import standardised indicators, you will first need to create an indicator set. To do so follow this guide.
Select the standard indicator set into which you would like to import your global indicators and navigate to the ‘Standard indicators in this set’ tab.
Once opened, select the file icon
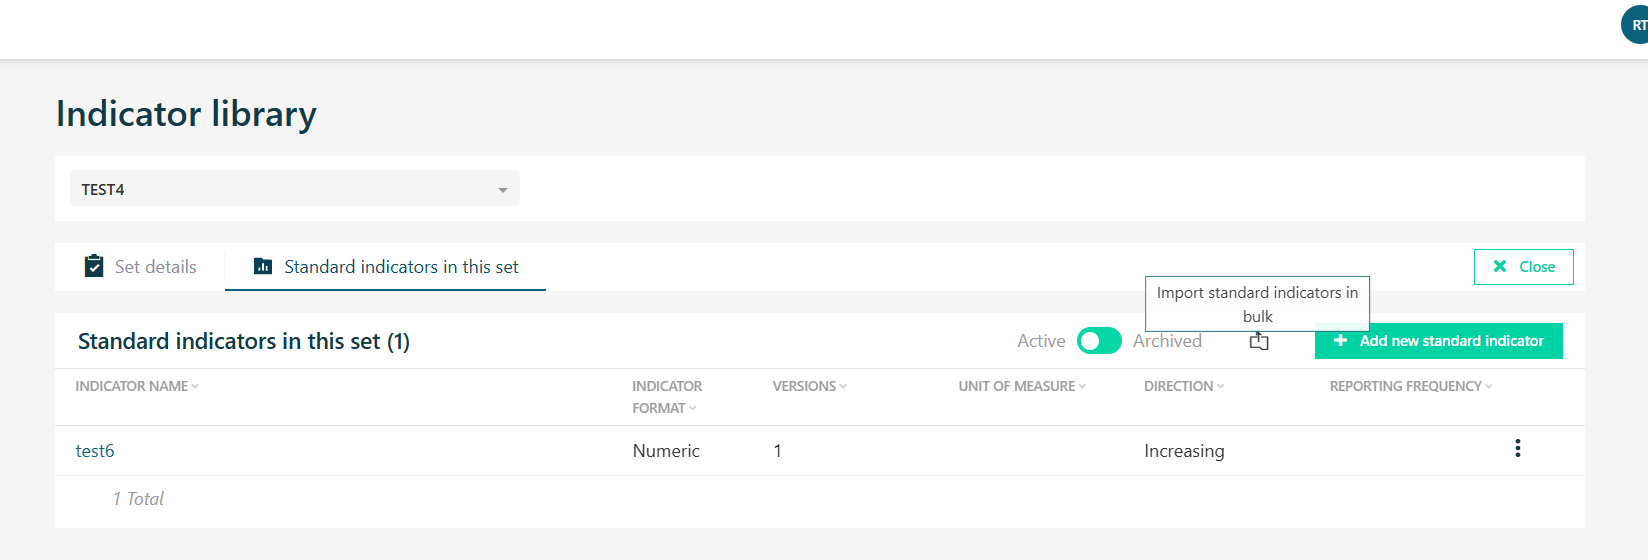
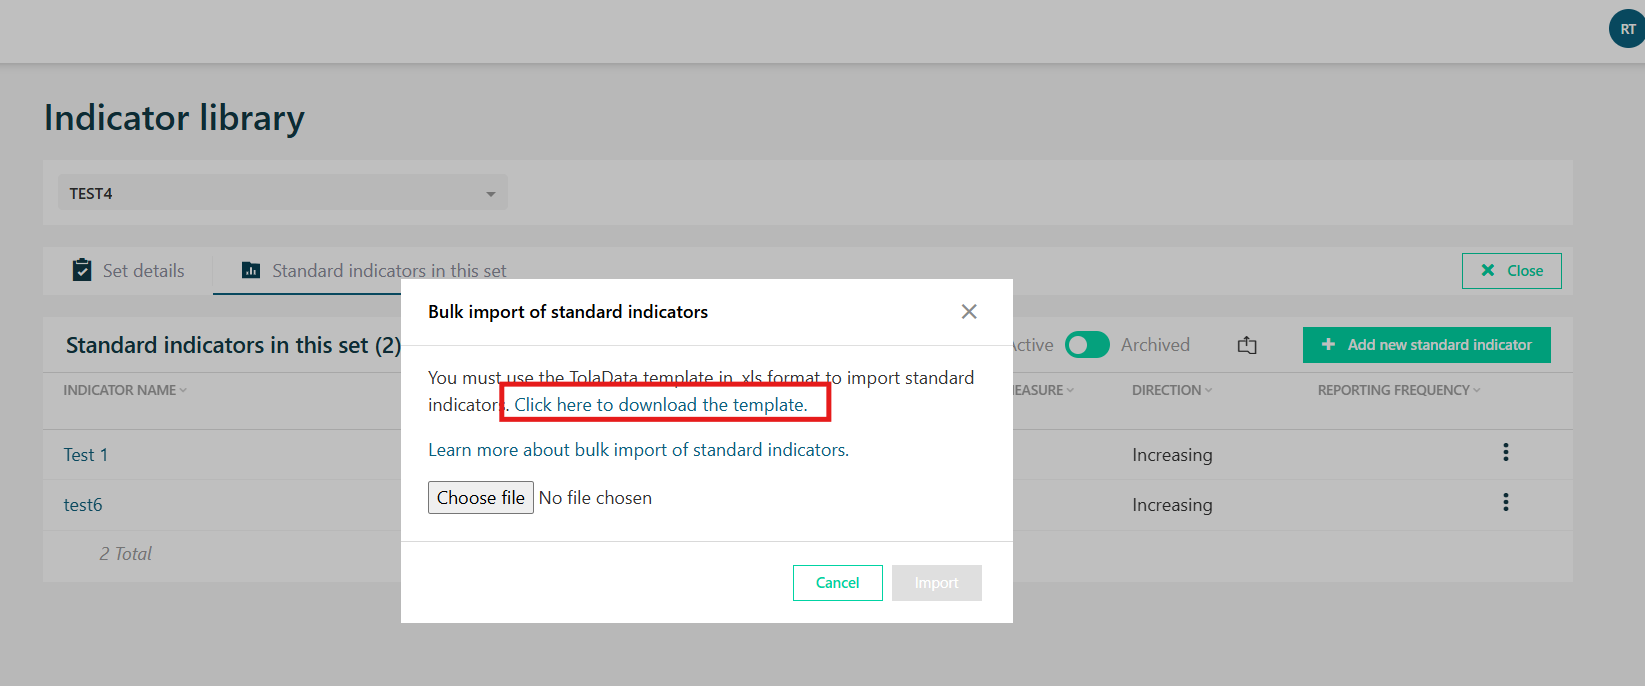
to download the import template from the link in the pop-up.
Fill in the template with your desired indicators. Keep in mind the following guidelines:
- Each row represents a single indicator. Ensure that all the information pertaining to each indicator is included only on their dedicated row.
- There are three types of required fields for each indicator and they are highlighted in orange in the template. These are the ‘Standard indicator name’, ‘format’ and the ‘locked’ fields. These must be filled in for each indicator, otherwise the import will fail. Other fields can remain empty.*
- Several fields use a drop-down menu. Only values from these menus can be read by our system.
- Once you’ve filled the template, simply save it in ‘XLSX’ format
*Please note for numeric and percentage indicators the ‘Expected direction’ should also be filled using the drop down-option.
Hints regarding specific fields:
- Indicator name: this field has a character limit of 255 characters.
- Locked fields eg. ‘Name field locked for editing at copy indicator/ project level’: If a global indicator field is locked, it means that those pulling the global indicator into the workspace/ project level will be unable to edit and change that element of the indicator. The field will be locked and greyed out so that the user cannot edit it. With this, Org admins can ensure that certain fields of a standardised indicator remain constant across all workspaces/ projects to which the indicator has been linked.
- Expected direction: most indicators will usually have an ‘Increasing’ direction (Meaning that the indicator values are generally expected to increase over time instead of decreasing)
To ensure the template will upload, it must be in the exact format specified:
- Do not edit the header row or change the order of columns of the template sheet.
- Do not add any text outside of an indicator line, otherwise the import will fail.
- Make sure to save the template in XLSX format.
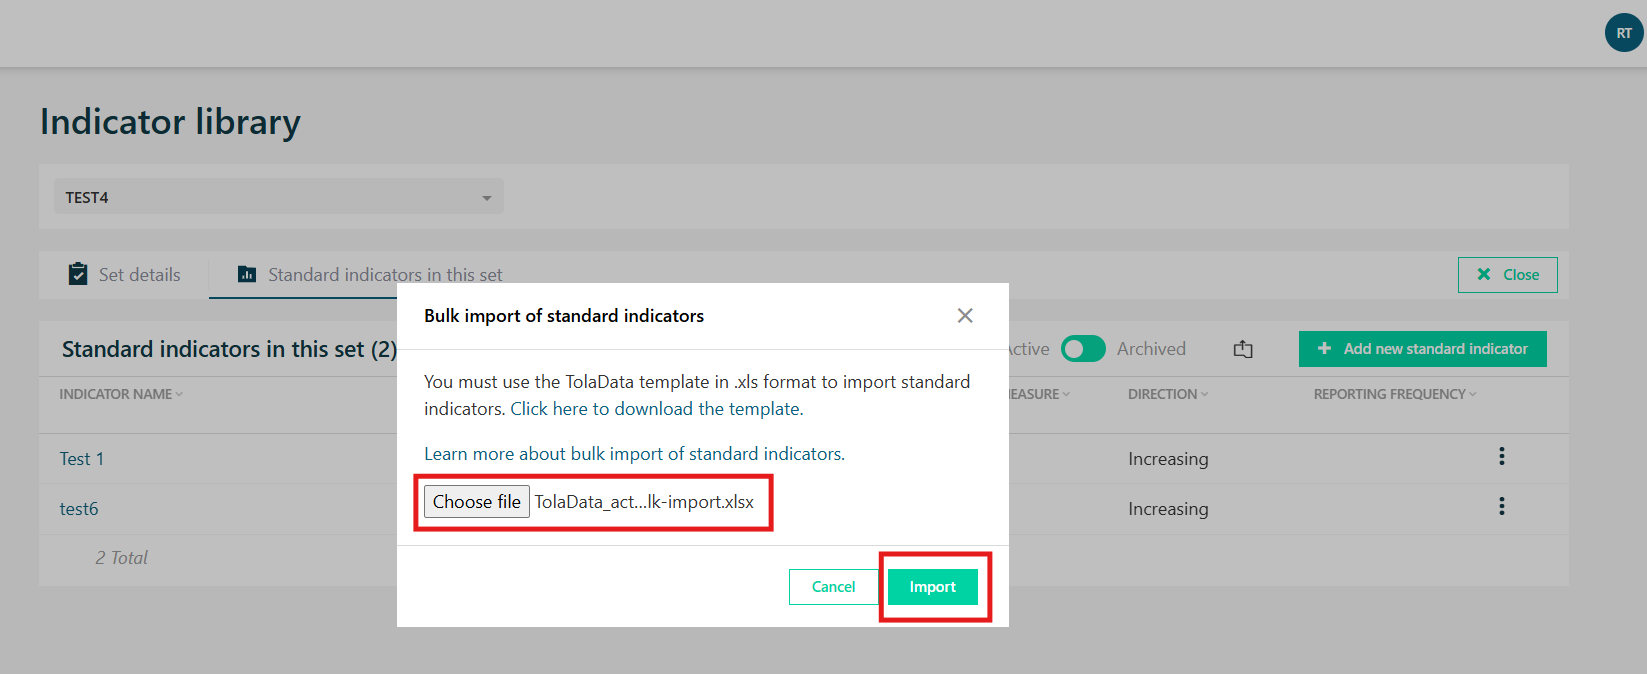
To upload, click the ‘import indicators in bulk’ icon and, this time, select ‘Choose File’. Locate your prepared bulk import template and click ‘Import’.
Once imported, you can begin adding the standardised indicators to workspace/ project indicator workflows. To find out more about how to add indicators from the indicator library to your workspace/project see this guide.