There are two ways to add collected data to indicators in TolaData – ‘manually’ and ‘pulling data from the data table.’
How to add data manually
Go to the ‘Collected data’ tab of your indicator.
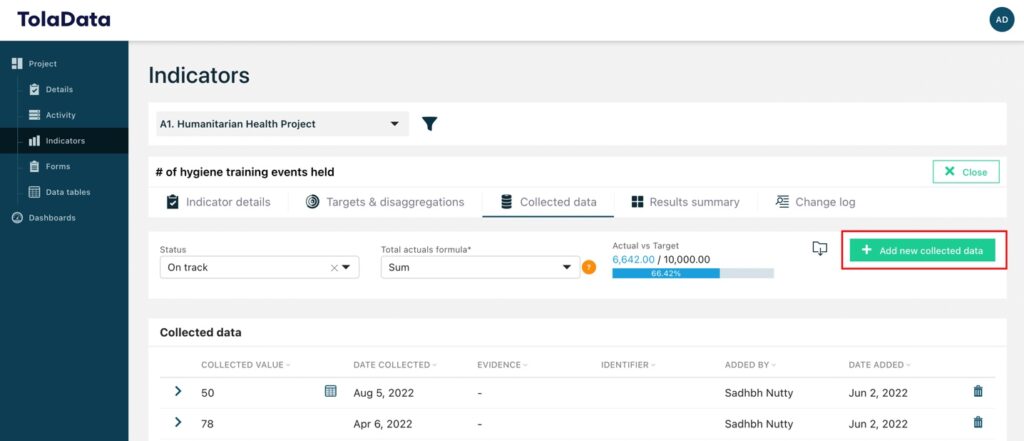
To add a new collected data item, click ‘Add new collected data’. Two options will appear, ‘Manual entry’ and ‘Pull from data table.’

With manual entry, you can input your latest result for the indicator manually. Enter ‘Collected value’ which is the value of your new result and the ‘Date collected.’ You can also enter an ‘Identifier’ that can help in differentiating the results in the collected data list for the indicator. Plus, you have the option of linking the collected data item to one of your project’s sites.
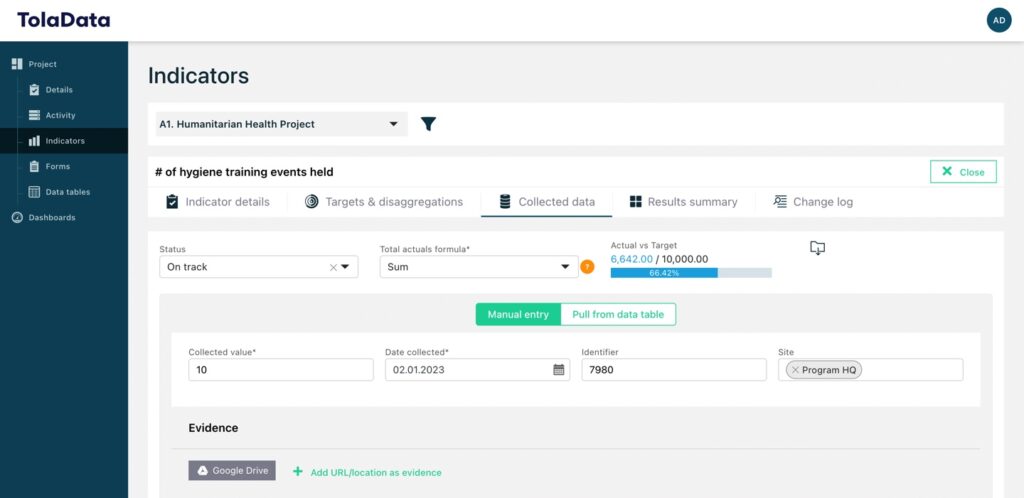
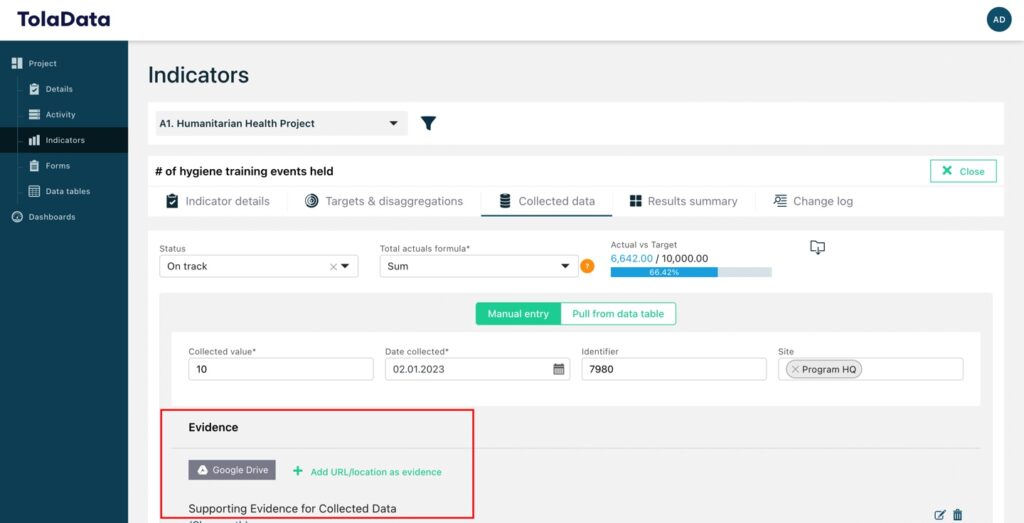
Evidence supporting the collected data item can be linked through a Google Drive file or by adding a URL. The URL can be a file link to another cloud file server or a website. Any additional supporting information or images can be added in the notes section.
Disaggregations can be added to the collected data item by clicking ‘Add disaggregation data.’
Select the disaggregation type from the drop down list and then enter the values for each disaggregation value.
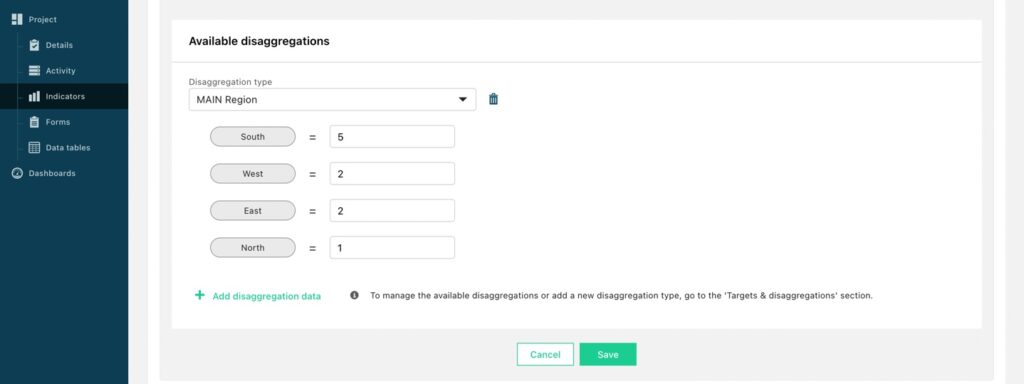
Top tip: you can add data for more than one disaggregation type on the same collected value by clicking ‘Add disaggregation data’ again.
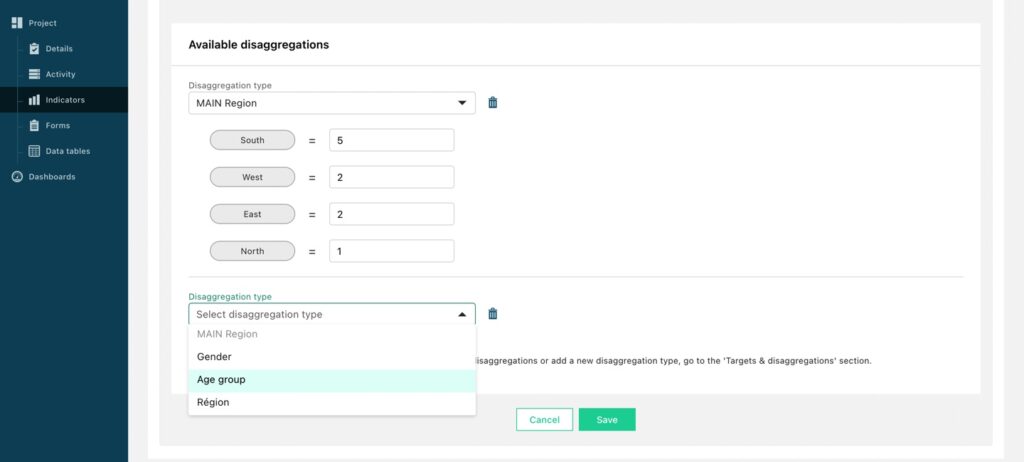
For more information on disaggreations in TolaData see ‘Managing Disaggregations.’
How to calculate results from datasets
Your collected data result can also be calculated directly from a data set ensuring accuracy and traceability of your results.
First, you need to import your data into Data tables or collect data using a form created in our form builder.
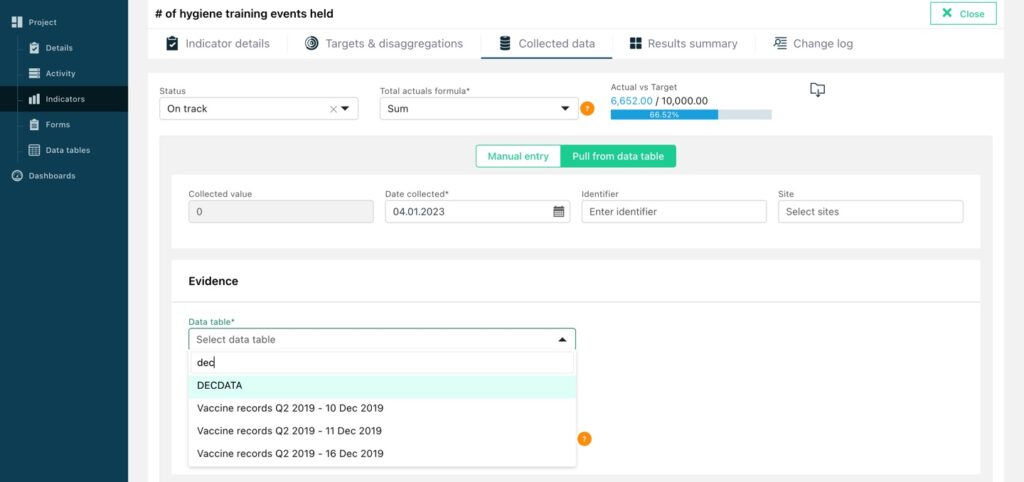
To link your data set to your indicator, open the indicator, click ‘Collected Data’ tab and then click ‘Add new collected data’.

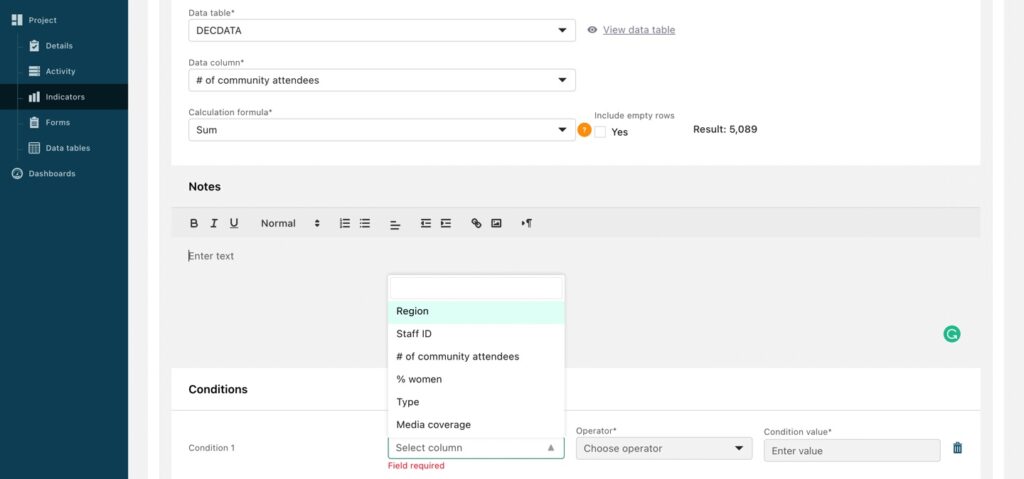
This time, select ‘Pull from data table’. You will notice that the collected value box is greyed out, preventing you from entering any data manually. Once again, you must add the ‘Date collected’ and you also have the option to add an ‘Identifier’ and ‘Site.’ In the evidence section, instead of being able to link a Google Drive file or URL, you will now select the imported data set you want to calculate your result from. This dataset becomes the underlying evidence for your result.
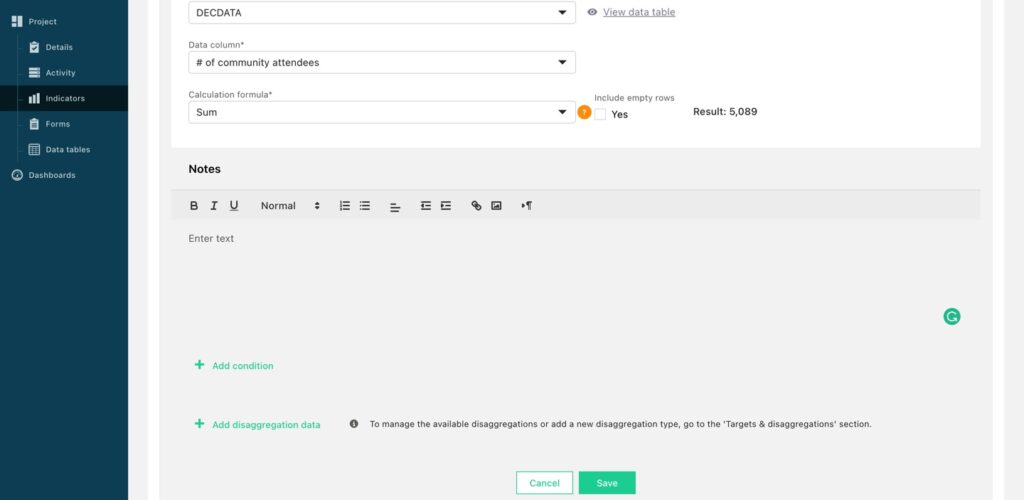
Select the column of the data table that you want to perform the calculation on and then select what calculation formula you would like to use – row count, sum, average or median. For percentage indicator, you also have the option to use a ratio formula (for example, to calculate what percentage of results in the column are certain value such as ‘yes’).

The calculated result will be displayed for you to verify.
How to add disaggregation data when you pull data from the data tables
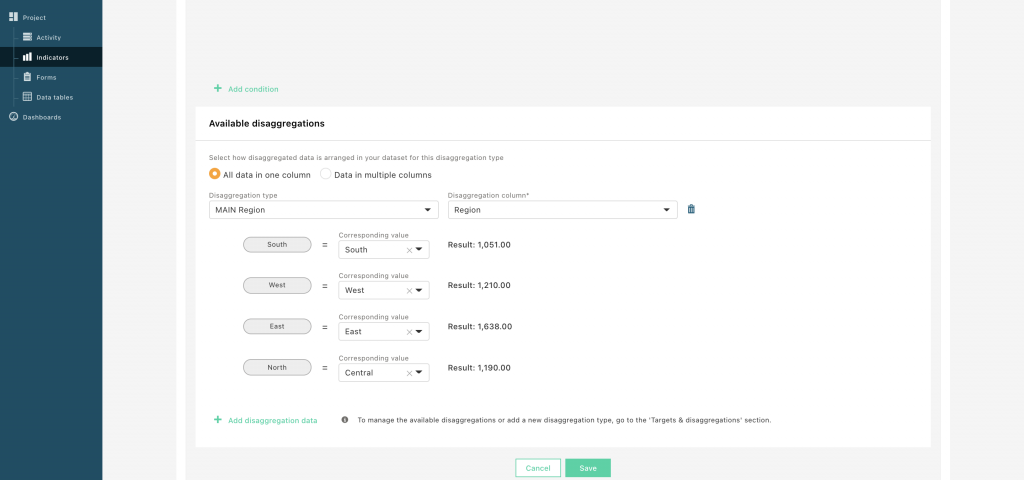
You can also use the data in your linked dataset to disaggregate your results.
Click ‘+Add disaggregation data’.
Select the ‘Disaggregation type’ you want to use and then select the column of your data set which contains the disaggregated data. TolaData will automatically attempt to map your disaggregation values to the data in your column. You can also manually map the disaggregation values that have been set in TolaData to the values used in your dataset.
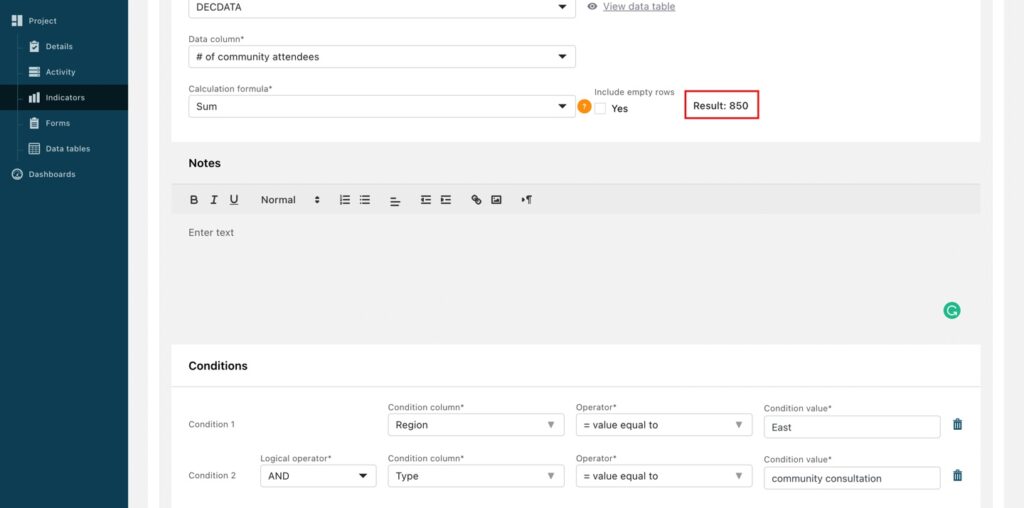
Using conditions when calculating results from data tables
You can apply ‘Conditions’ when you want only certain rows of your data table to be included in the calculation. This means your results will be filtered according to the condition(s) you set.
After selecting the data table and column for your collected value, click ‘Add condition’. Select the column which has the data you wish to use for your condition.
Next, define how the condition should be applied (for example – do you want all rows equal to a value in your column or all rows greater than a value, etc), define the value to use and the result will automatically recalculate according to that condition.

You can add more conditions by clicking ‘Add condition’ again.
How to link supporting evidence from cloud storage services
Want to add some solid evidence to justify your results? No problem! In TolaData any kind of document stored on a cloud file server can be linked to your indicator results. You can either access your Google Drive directly by clicking the ‘Google Drive’ button and choose the corresponding file from your Drive, or you can input the URL link for a file in another cloud file server or on a website.
Note: The first time you attempt to link your supporting evidence, you will have to provide authorization to TolaData to access your Google Drive.